
The common reason for water leakage in the toilet is that the hemispherical rubber cover that covers the drain outlet is lighter. After the water tank is discharged, it leaks due to insufficient gravity and is not tight enough when it falls. It often needs to be repeated repeatedly before the cover is tight.
Treatment method for toilet leaking - Causes of water leakage at the bottom of toilet
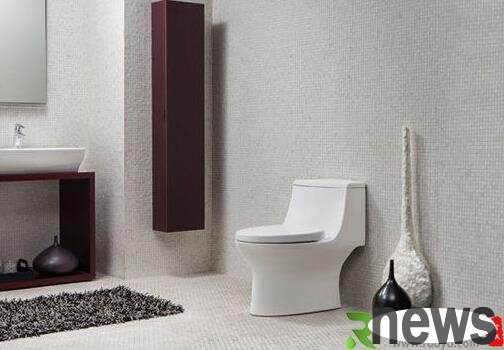
Treatment method for toilet leaking
① Material selection should comply with the rules of material in the JC707-1997 "Low Water Tank Accessories for Toilets", that is, the materials of plastic parts should comply with the rules of GB12670, GB12671 and GB12672 respectively.
② The buoyancy of a float ball (or float barrel) must be calculated theoretically. At least under a pressure of 0.6Mpa, the float ball can be sealed when it swallows 3/4.
③ Because the toilet has different sizes, when designing water tank accessories, you should fully consider the various mechanisms that move freely after the installation and do not interfere with each other.
④ Install filter on the water inlet valve.
⑤ The material selection of drain valve covers should be appropriate, the manufacturing should be precise, and the maintenance during packaging and transportation should be enhanced to prevent deformation.
⑥ It is best to have the drain valve body formed at one time. If it cannot be formed at one time, it is best to use a thread and water-resistant adhesive assembly at each joint; the lifting water inlet valve must have at least a double sealing ring to ensure its sealing performance.
The common reason for water leakage in the toilet is that the hemispherical rubber cover that covers the drain outlet is lighter. After the water tank is discharged, it leaks due to insufficient gravity and is not tight enough when it falls. It often needs to be repeated repeatedly before the cover is tight.
The method of handling is to tie a little heavy object on the connecting rod connecting the rubber cover, such as large nuts, toothpaste skin, etc., and pay attention to the binding object as close as possible to the rubber cover, so that the rubber cover is easier to cover the drainage port tightly, and the water leakage problem will be dealt with.
Families with conditions should replace water-saving sanitary utensils, and recommend that everyone install water-saving utensils or sanitary utensils, use ceramic chip sealed water nozzles, eliminate spiral lifting iron water nozzles, and transform toilet water tanks of more than 9 liters, and use toilet water tanks of no more than 6 liters. For existing non-water-saving toilets in use, you can try to place a brick or a salt water bottle in the water tank to reduce the amount of flushing water.
Reasons for water leakage at the bottom of the toilet:
1. The toilet was not installed when installed, causing the sewage outlet on the ground to be misaligned with the diameter of the toilet drain. This will cause yellow water, water and odor.
2. The installation is not professional and there is no flange installed (the flange has good fixation and anti-spill effect).
3. Long-term use is suitable for loosening of the toilet and the floor.
4. The problem with the toilet seat itself is that there are cracks in the ceramic (rare).
The above reasons are the most direct causes of water leakage at the bottom of the toilet. If you are willing to do it yourself, you should pay attention to the following points:
1. Make sure that the water parts inside the water tank are installed correctly and tightly. It can be closed with glass glue at the bottom of the water inlet and the junction of the water tank. The bottom of the flushing part is treated the same.
2. Make sure that the rubber ring at the connection between the water tank and the toilet body is elastic enough, and the connection between the water tank and the toilet body is tight enough.
3. Apply neutral glass glue to the rubber ring between the water tank and the toilet body.
4. Before construction, please wipe the glue applying part dry. It is best to keep it free of water for 24 hours after construction.
Now that there is silicone, many toilet installations omit the use of expansion bolts to fix it, and directly fix it with silicone with strong adhesion and seal it. After sealing it with putty for a long time, it will harden and cause cracks and water leakage. If the silicone is not fully cleaned before bonding, it is easy to cause local water leakage.
If you are sure that the toilet is not cracked, just remove the dirty things from the floor tiles at the bottom and joints of the toilet, dry them, and then put a circle of silicone to seal them. Remember to disable the toilet for one night.
If the bottom of your toilet is cemented, it will be troublesome, because silicone often finds it difficult to stick to rough cement, so that it requires a re-used waterproof mortar to seal it reliably.
Toilet flushing method
If the toilet is drained according to the toilet, the toilet can be divided into flushing and siphon: the toilet purchase depends on the direction of sewage discharge. If it is a rear-row type, you need to buy a flush toilet, which can directly discharge the dirt with the help of the water. The flushing-type sewage outlet is larger and deep, and the dirt is directly discharged with the help of the flushing water. The disadvantage is that the flushing sound is loud. If it is a lower row, you should choose a siphon toilet. There are two types of siphon subdivisions, including jet siphon and swirl siphon. The principle of a siphon toilet is to use flushing water to form a siphon effect in the sewage discharge pipe to discharge the dirt. The sewage outlet is smaller, the noise is low and it is quieter when used. The disadvantage is that the amount of water is large, and the storage capacity of 6 liters is usually used up at one time.
If the toilet is according to the direction of the sewage discharge, the toilet can be divided into a rear and a lower row: the rear row type is also called a wall or horizontal row type, and the direction of its sewage discharge can be known according to the literal meaning. When purchasing a rear-row toilet, consider the height of the center of the sewage outlet from the ground, which is generally 180mm; the lower-row type is also called the ground-row or vertical type. As the name suggests, it refers to the toilet with the sewage outlet on the ground. When purchasing a lower-discharge toilet, you should pay attention to the distance between the center point of the sewage outlet and the wall. The distance between the sewage outlet and the wall is divided into three types: 400mm, 305mm and 200mm. Among them, the northern market has a high demand for 400mm pit distance products. The southern market has a high demand for 305mm pit distance products.